
| 일 | 월 | 화 | 수 | 목 | 금 | 토 |
|---|---|---|---|---|---|---|
| 1 | 2 | 3 | 4 | 5 | ||
| 6 | 7 | 8 | 9 | 10 | 11 | 12 |
| 13 | 14 | 15 | 16 | 17 | 18 | 19 |
| 20 | 21 | 22 | 23 | 24 | 25 | 26 |
| 27 | 28 | 29 | 30 |
- Django
- kibana
- programmers
- 해시
- elasticsearch
- 프로그래머스
- 장고
- 스파크
- RecommendationSystem
- 깊이우선탐색
- Optimization
- AWS
- Easy
- Algorithm
- Spark
- python
- 엘라스틱서치
- 알고리즘
- daspecialty
- Medium
- leetcode
- 파이썬
- dfs
- ELK
- dump
- solution
- CentOS
- 리트코드
- twosum
- 키바나
- Today
- Total
Archive
[Django] Book Application 개발 (실습3) 본문
1. Application 설계
책/저자/출판사 정보를 관리하는 Web = 정보 입력/수정/삭제 기능 필요
1) UI 설계
책 요약 페이지 / 책 리스트 / 책 상세페이지 총 세 개의 페이지로 되어있다.

2) Table 설계
① Book Table
② Author Table
③ Publisher Table
3) View Flow 설계
2. Application 설계
① App 생성
$ python manage.py startapp books
② App 등록
settings.py에서 'books.apps.BooksConfig' 추가
#DjangoProject/settings.py

# Application definition

INSTALLED_APPS = [
    'django.contrib.admin',
    'django.contrib.auth',
    'django.contrib.contenttypes',
    'django.contrib.sessions',
    'django.contrib.messages',
    'django.contrib.staticfiles',
    'polls.apps.PollsConfig',
    #book app config 추가
    'books.apps.BooksConfig'
]
3. Model
1) models.py Table 정의
#DjangoProject/books/models.py

from django.db import models

# Create your models here.
class Book(models.Model):
    title = models.CharField(max_length=100)
    authors = models.ManyToManyField('Author')
    publisher = models.ForeignKey('Publisher', on_delete=models.CASCADE)
    pub_date = models.DateField()

    def __str__(self):
        return self.title

class Author(models.Model):
    name = models.CharField(max_length=50)
    salutation = models.CharField(max_length=100)
    email = models.EmailField()

    def __str__(self):
        return self.name

class Publisher(models.Model):
    name = models.CharField(max_length=50)
    address = models.CharField(max_length=200)
    website = models.URLField()

    def __str__(self):
        return self.name
*테이블 간의 관계를 나타낼 때는 ForeignKey(N:1), ManyToManyField(N:N), OnetoOneField(1:1) 로 나타낼 수 있다.
*ForeignKey 필드를 사용할 땐, on_delete 옵션을 사용해야 한다
- on_delete = CASCADE : Publisher쪽의 레코드가 삭제되면, 해당 레코드에 연결된 Book 테이블의 레코드도 삭제한다는 의미
- 총 7종류가 있으며 자세한 내용은 공식문서 참고
2) admins.py Table 등록
#DjangoProject/books/admin.py

from django.contrib import admin
from books.models import Book,Author,Publisher
# Register your models here.

admin.site.register(Book)
admin.site.register(Author)
admin.site.register(Publisher)
3) Migration
정의한 테이블 DB반영
(venv) % python manage.py makemigrations
(venv) % python manage.py migrate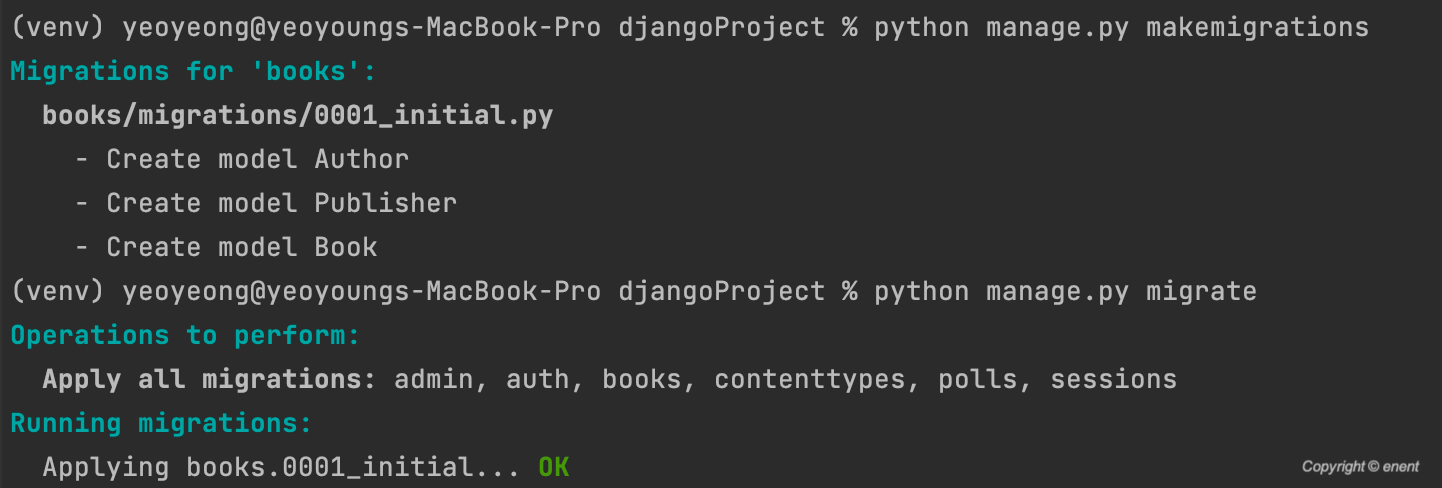
4. URLconf
설계한 View Flow를 참고하여 URLconf를 정의
① DjangoProject/urls.py books.urls 추가
from django.contrib import admin
from django.urls import path, include

urlpatterns = [
    path('admin/', admin.site.urls),
    path('polls/', include('polls.urls')),
    #books.urls 추가
    path('books/'), include('books.urls')
]
② DjangoProject/books/urls.py 상세 url 추가
from django.urls import path
from . import views

app_name = 'books'
urlpatterns = [
    #/books
    path('',views.BooksModelView.as_view(), name='index'),
    #/books/book
    path('book/',views.BookList.as_view(), name='book_list'),
    #/books/author/
    path('author/', views.AuthorList.as_view(), name='author_list'),
    #/books/publisher/
    path('publisher/', views.PublisherList.as_view(), name='publisher_list'),
    #/books/book/99/
    path('book/<int:pk>/', views.BookDetail.as_view(), name='book_detail'),
    #/books/author/99/
    path('author/<int:pk>/', views.AuthorDetail.as_view(), name='author_detail'),
    #/books/publisher/99/
    path('publisher/<int:pk>', views.PublisherDetail.as_view(), name='publisher_detail'),
]
5. View
① TemplateView
#DjangoProject/books/views.py
from django.shortcuts import render

# Create your views here.
from django.views.generic.base import TemplateView
from django.views.generic.detail import DetailView
from django.views.generic.list import ListView
from books.models import Book, Author, Publisher

#Template View
class BooksModelView(TemplateView):
    template_name = 'books/index.html'

    def get_context_data(self, **kwargs):
        context = super().get_context_data(**kwargs)
        context['model_list'] = ['Book','Author','Publisher']
        return context
* TemplateView : 특정한 로직없이 템플릿파일만을 렌더링하는 경우 사용
- template_name : TemplateView 사용시 해당 클래스 변수를 지정해줘야 함.
- get_context_data() : Template 시스템으로 넘겨줘야하는 변수가 있을 때 사용하며, 반드시 super() method 를 먼저 호출해야 한다.
** super() : 부모 클래스 상속 받는 경우 사용
② ListView
#DjangoProject/books/views.py
from django.shortcuts import render

# Create your views here.
from django.views.generic.base import TemplateView
from django.views.generic.detail import DetailView
from django.views.generic.list import ListView
from books.models import Book, Author, Publisher

#TemplateView
...

#ListView
class BookList(ListView):
    model = Book

class AuthorList(ListView):
    model = Author

class PublisherList(ListView):
    model = Publisher
*ListView : 객체가 들어있는 리스트를 구성하여 context variable로 template system 에 넘겨준다. (모든 레코드를 가져와 구성하는 경우에는 Model Class명 ( Table 명) 을 지정해준다))
- ListView 사용시 자동으로 context variable 로 object_list를 사용하고, template file명을 [modelname]_list.html으로 자동 생성한다
③ DetailView
#DjangoProject/books/views.py
from django.shortcuts import render

# Create your views here.
from django.views.generic.base import TemplateView
from django.views.generic.detail import DetailView
from django.views.generic.list import ListView
from books.models import Book, Author, Publisher

#Template View

#ListView

#DetailView
class BookDetail(DetailView):
    model = Book

class AuthorDetail(DetailView):
    model = Author

class PublisherDetail(DetailView):
    model = Publisher
*DetailView : ListView와 마찬가지로,. 객체가 들어있는 리스트를 구성하여 context variable로 template system 에 넘겨준다. (모든 레코드를 가져와 구성하는 경우에는 Model Class명 ( Table 명) 을 지정해준다))
- DetailView 사용시 자동으로 context variable 로 object_list를 사용하고, template file명을 [modelname]_list.html으로 자동 생성한다
6. Template
현재 View Flow 상 Template도 7개가 필요하다.
1) Index.html
{% extends "base_books.html" %}

{% block content %}
    <h2>Books Management System</h2>
    <ul>
        {% for modelname in model_list %}
{% with "books:"|add:modelname|lower|add:"_list" as urlvar %}
            <li><a href="{% url urlvar %}">{{ modelname }}</a></li>
{% endwith %}
        {% endfor %}
    </ul>
{% endblock %}- base_books.html template을 상속받아 content 부분만 수정 (base_books.html은 제일 첫 화면으로 나중에 코딩 예정)
- View로 부터 model_list context 변수를 전달받아 model_list에 들어있는 modelname들을 순회하며 화면에 하나씩 보여줌
- modelname 클릭 시 접속할 URL 추출을 위해 {% url urlvar %} template tag 사용
: 현재 예시에선 modelname이 author라면, urlvar엔 books:author_list가 들어가게 됨
2) Child template ( *_list.html / *_detail.html )
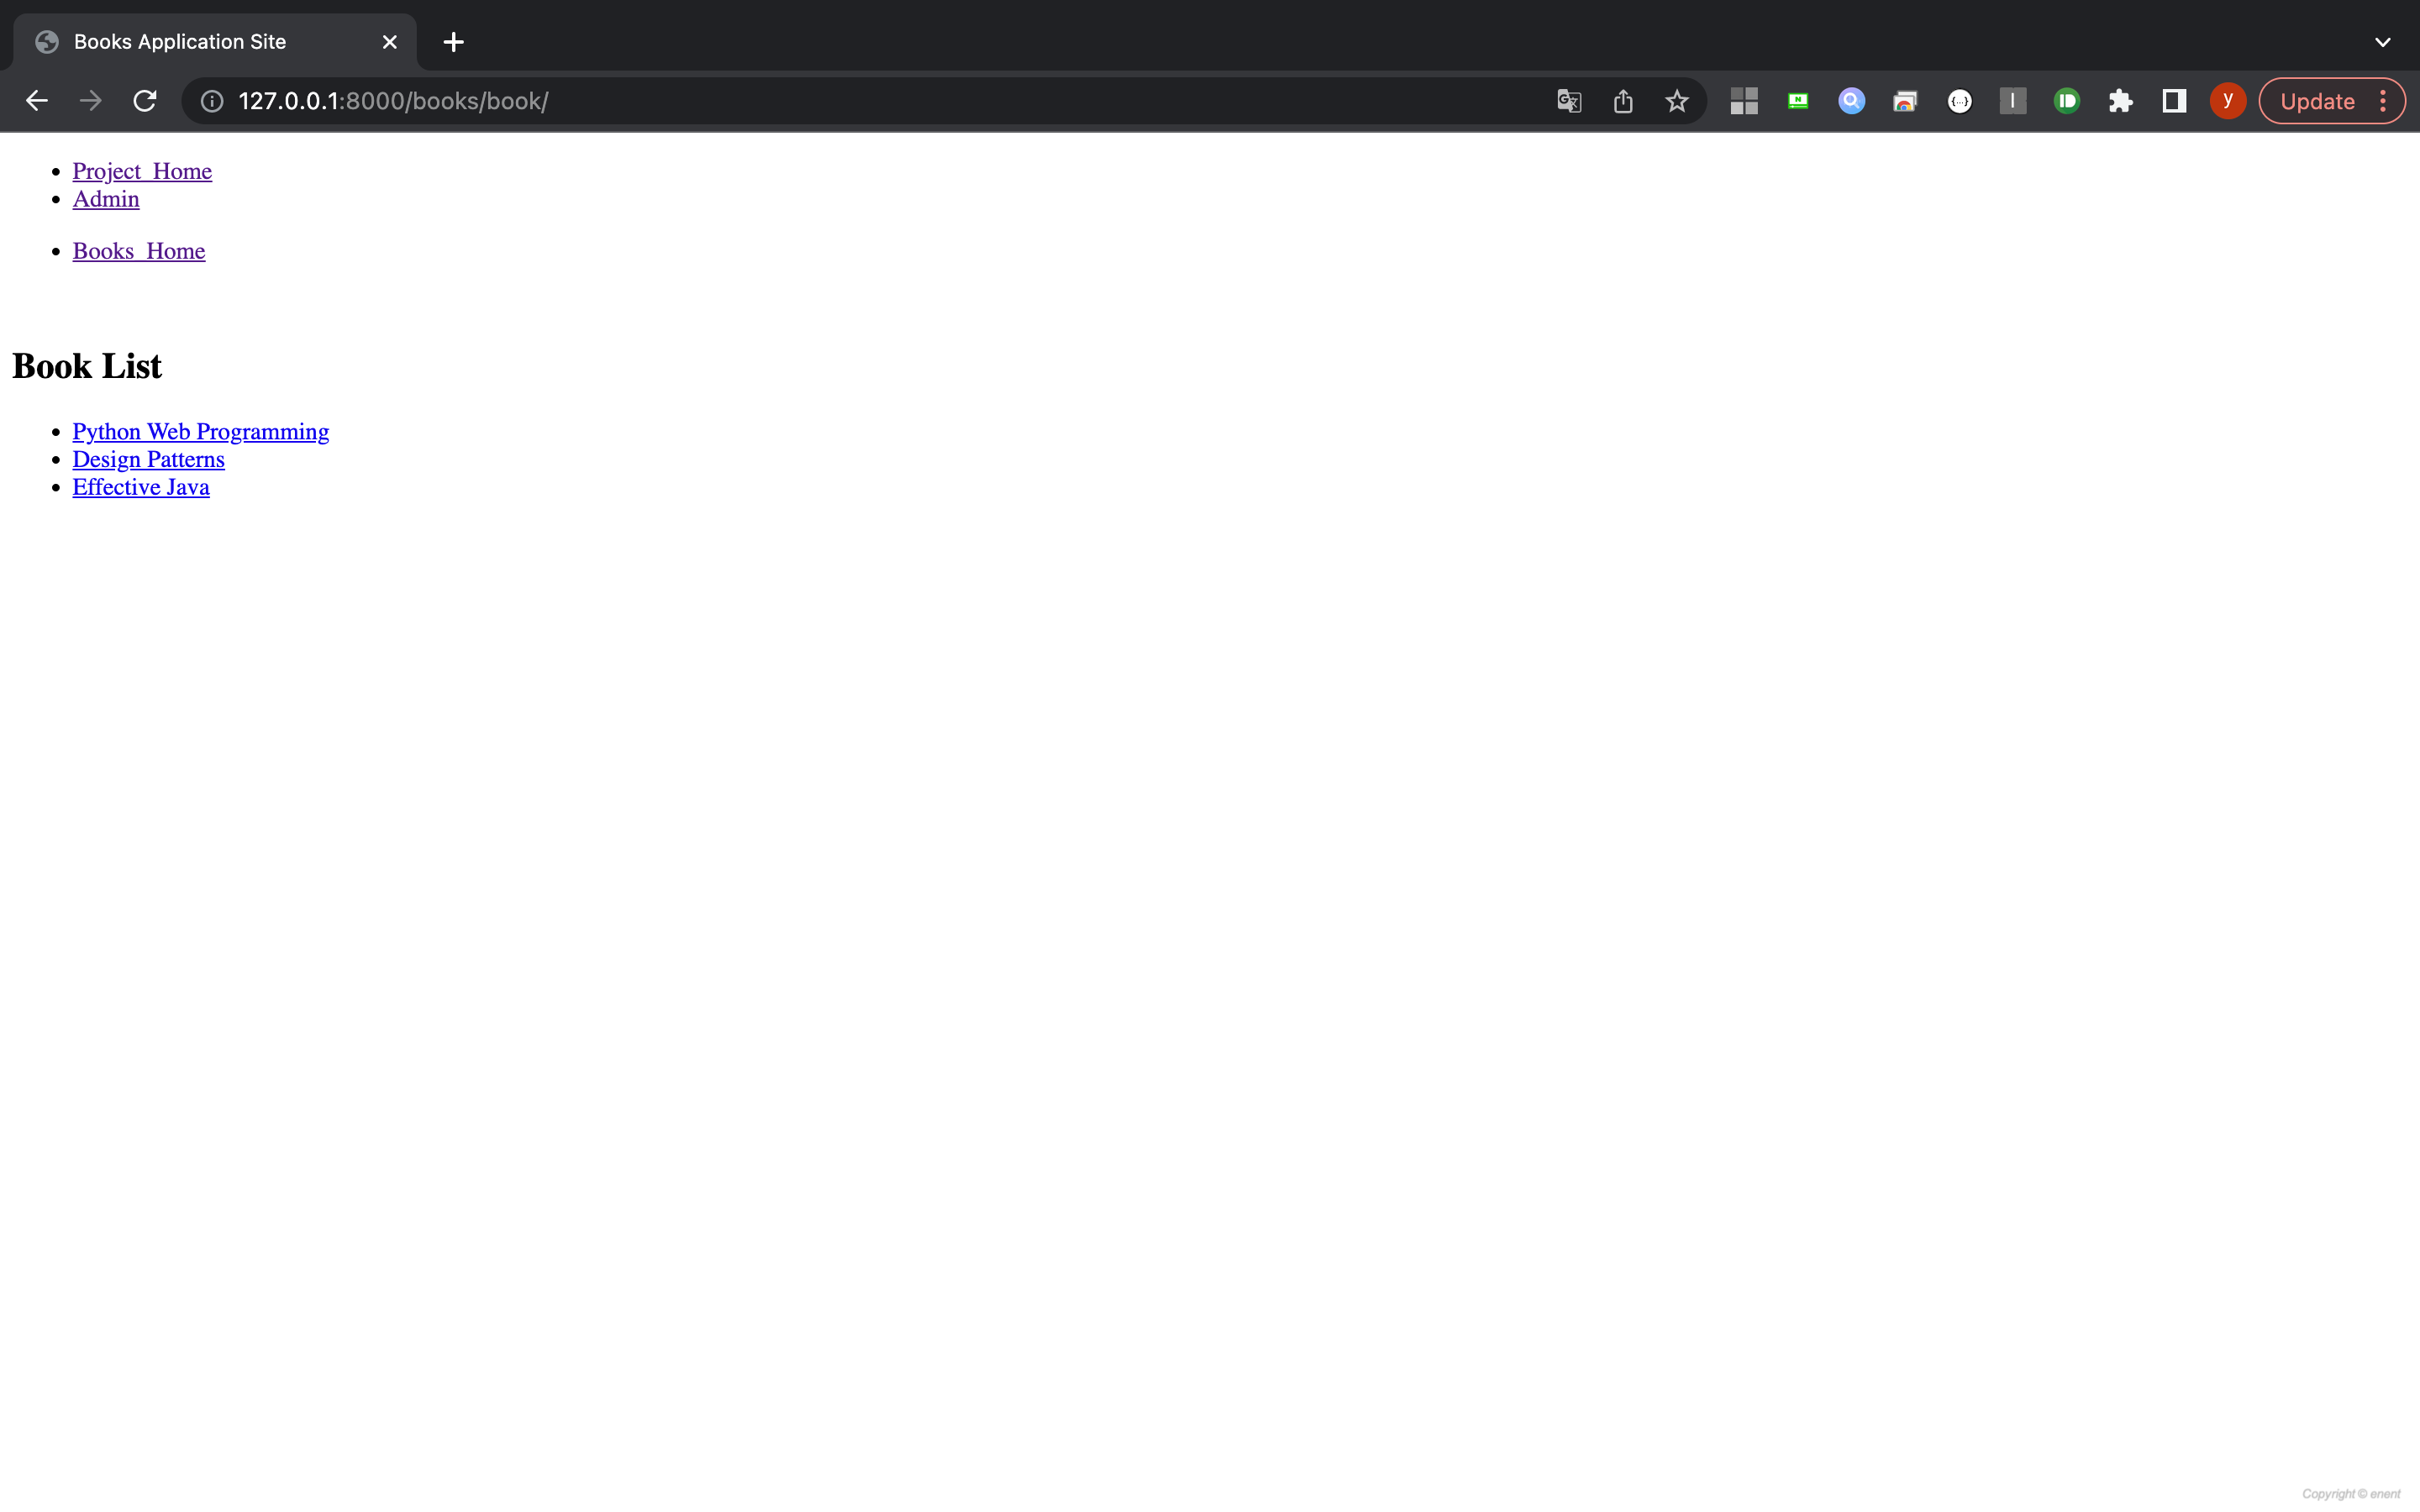
① book_list.html
- base_books.html template을 상속받아 content 부분만 수정 (base_books.html은 제일 첫 화면으로 나중에 코딩 예정)
- View로 부터 object_list context 변수를 전달받아 object_list에 들어있는 book객체를 순회하며 화면에 하나씩 보여줌
- book객체의 title 속성을 표시하고, 해당 텍스트를 클릭하는 경우 <a href> 태그 기능에 의해 books:book_detail URL 패턴으로 웹 요청을 보낸다
{% extends "base_books.html" %}

{% block content %}
    <h2>Book List</h2>
    <ul>
        {% for book in object_list %}
            <li><a href="{% url 'books:book_detail' book.id %}">{{ book.title }}</a></li>
        {% endfor %}
    </ul>
{% endblock content %}
② author_list.html
- author.id, author.name을 표시하는 것만 다르고, 나머지는 ①과 동일하다
{% extends "base_books.html" %}

{% block content %}
    <h2>Author List</h2>
    <ul>
        {% for author in object_list %}
            <li><a href="{% url 'books:author_detail' author.id %}">{{ author.name }}</a></li>
        {% endfor %}
    </ul>
{% endblock content %}
③ publisher_list.html
- publisher.id, publisher.name을 표시하는 것만 다르고, 나머지는 ①과 동일하다
{% extends "base_books.html" %}

{% block content %}
    <h2> Publisher List</h2>
    <ul>
        {% for publisher in object_list %}
            <li><a href="{% url 'books:publisher_detail' publisher.id %}">{{ publisher.name }}</a></li>
        {% endfor %}
    </ul>
{% endblock content %}
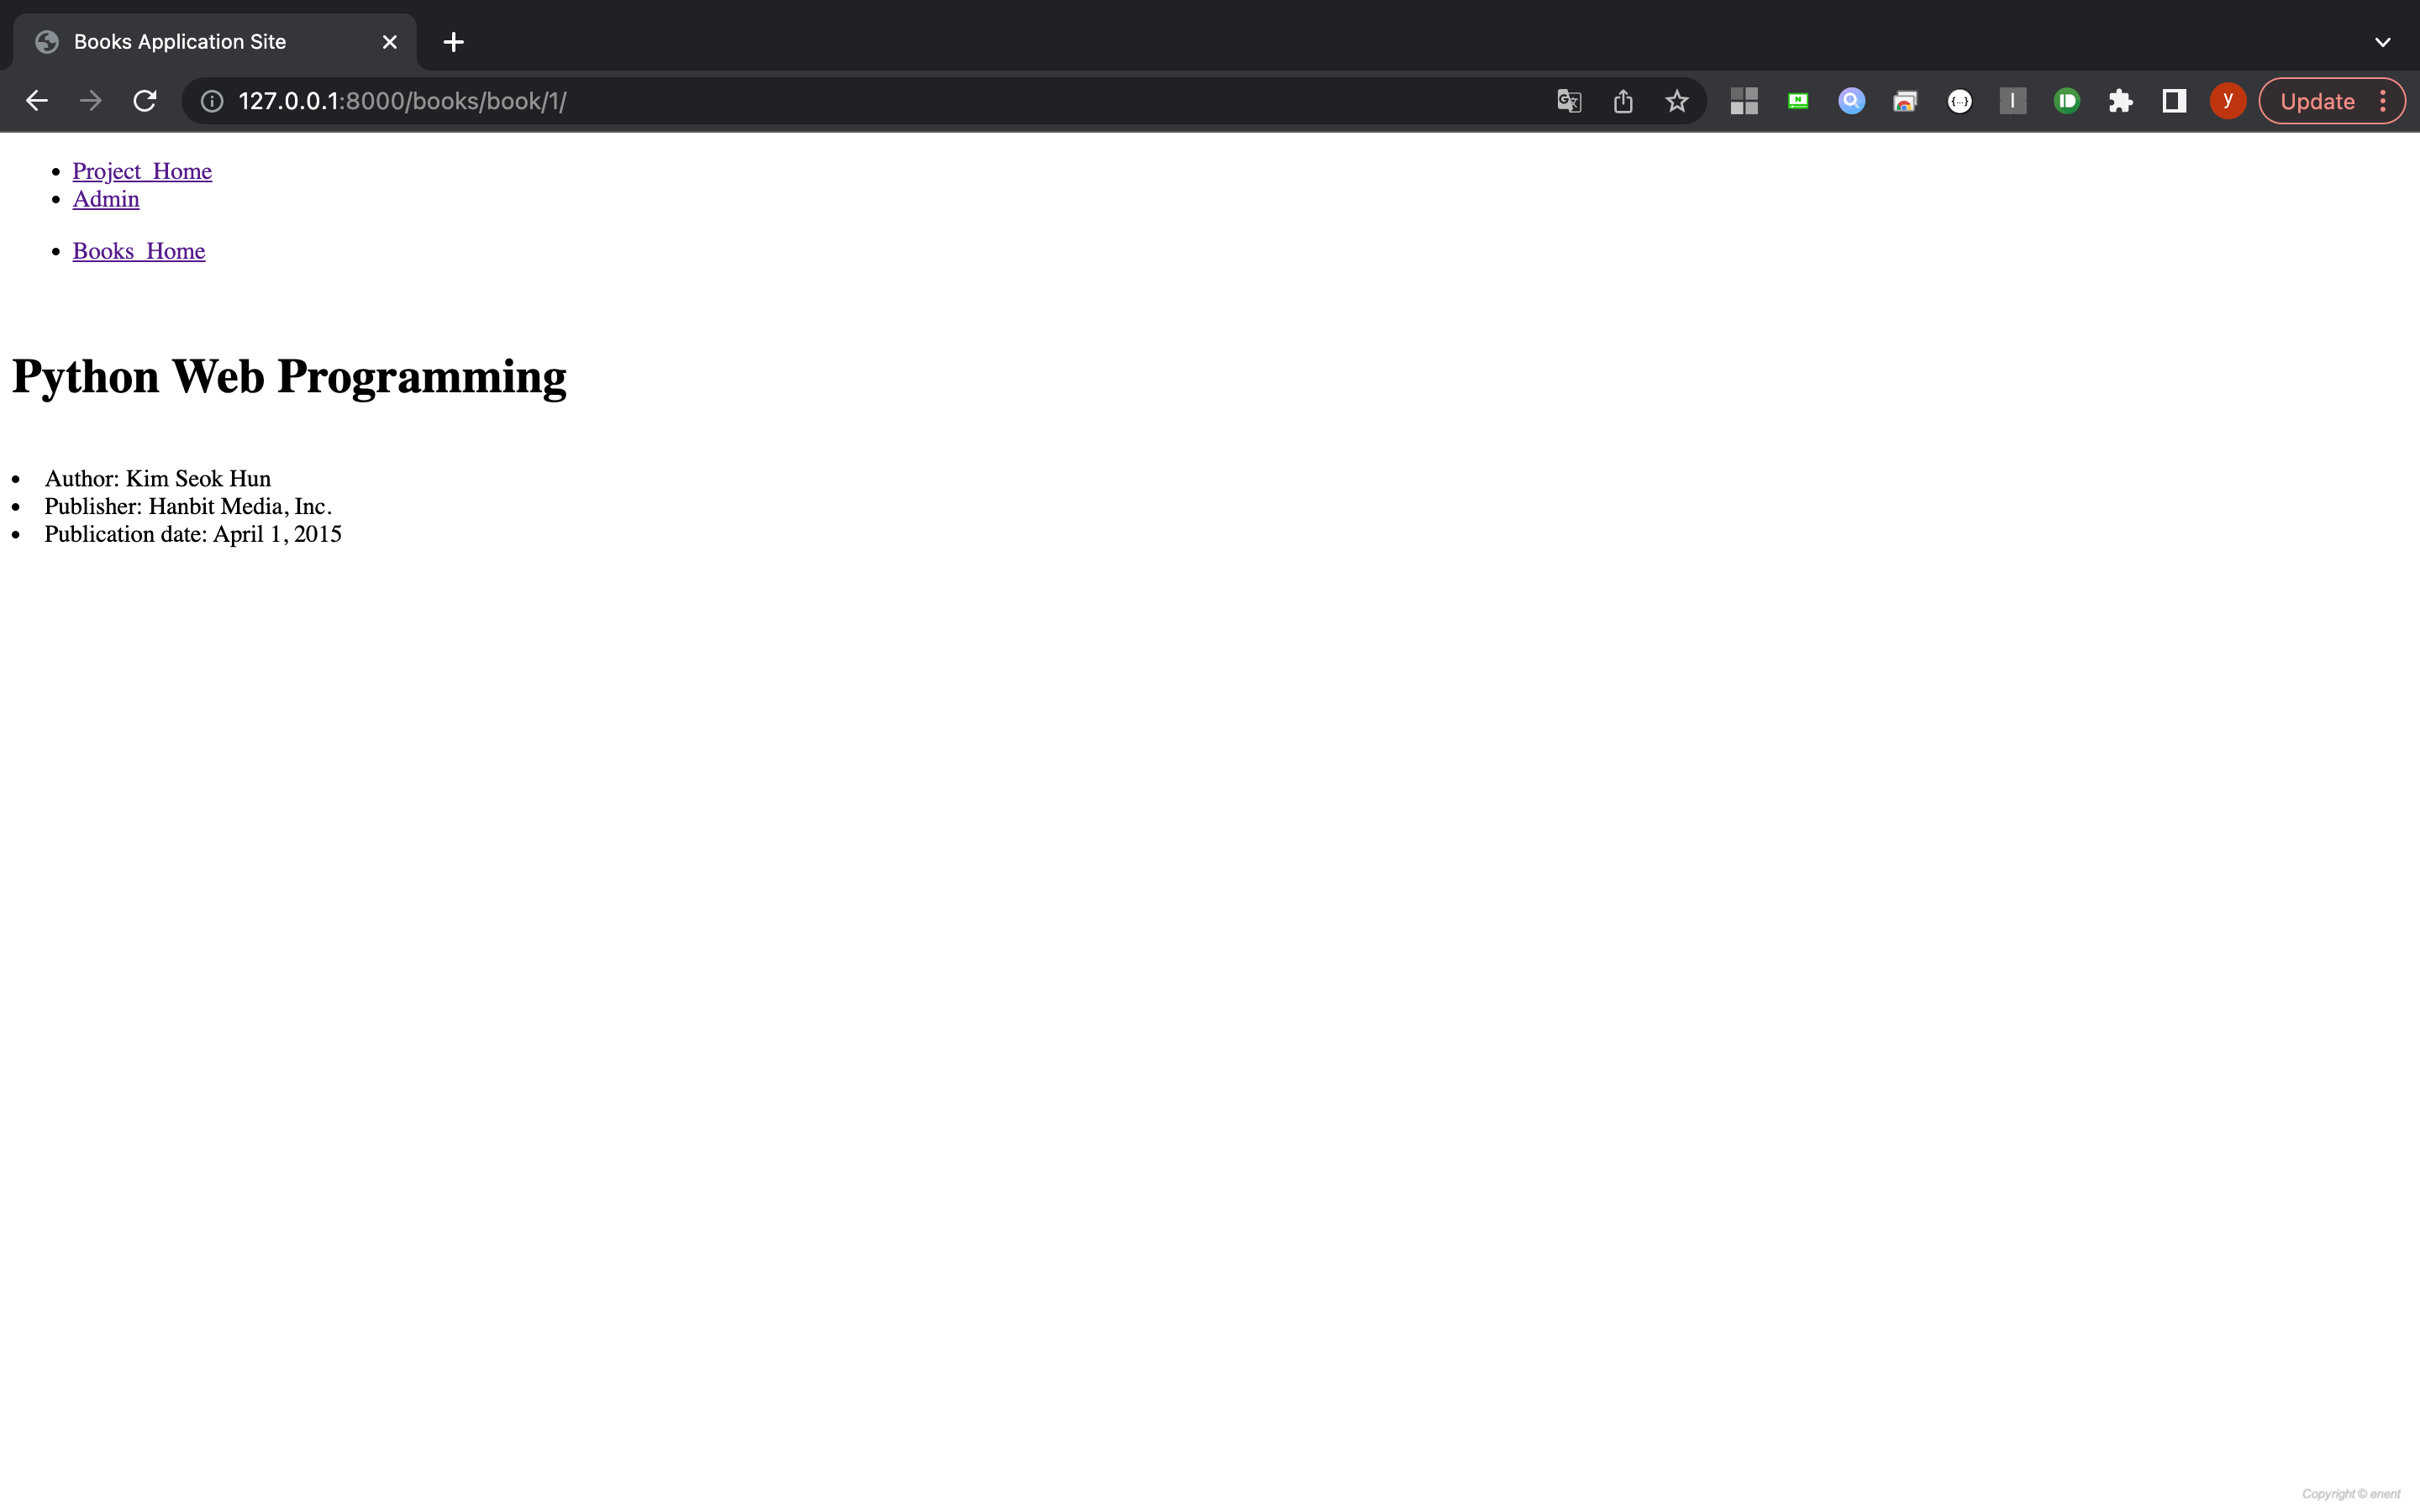
④ book_detail.html
- Book Table에 들어있는 record들을 표시하는 template
- object.authors.all() : View에서 넘어온 특정 Book 객체 중 author 모두 를 의미
- Author가 여러명일 수 있으므로, 여러명이라면 , 를 추가한다
{% extends "base_books.html" %}

{% block content %}
<h1>{{ object.title }}</h1>
<br>
<li>Author:
{% for author in object.authors.all %}
    {{ author }}
    {% if not forloop.last %},{% else %}{% endif %}
{% endfor %}
</li>
<li>Publisher: {{ object.publisher }}</li>
<li>Publication date: {{ object.pub_date }}</li>
{% endblock content %}
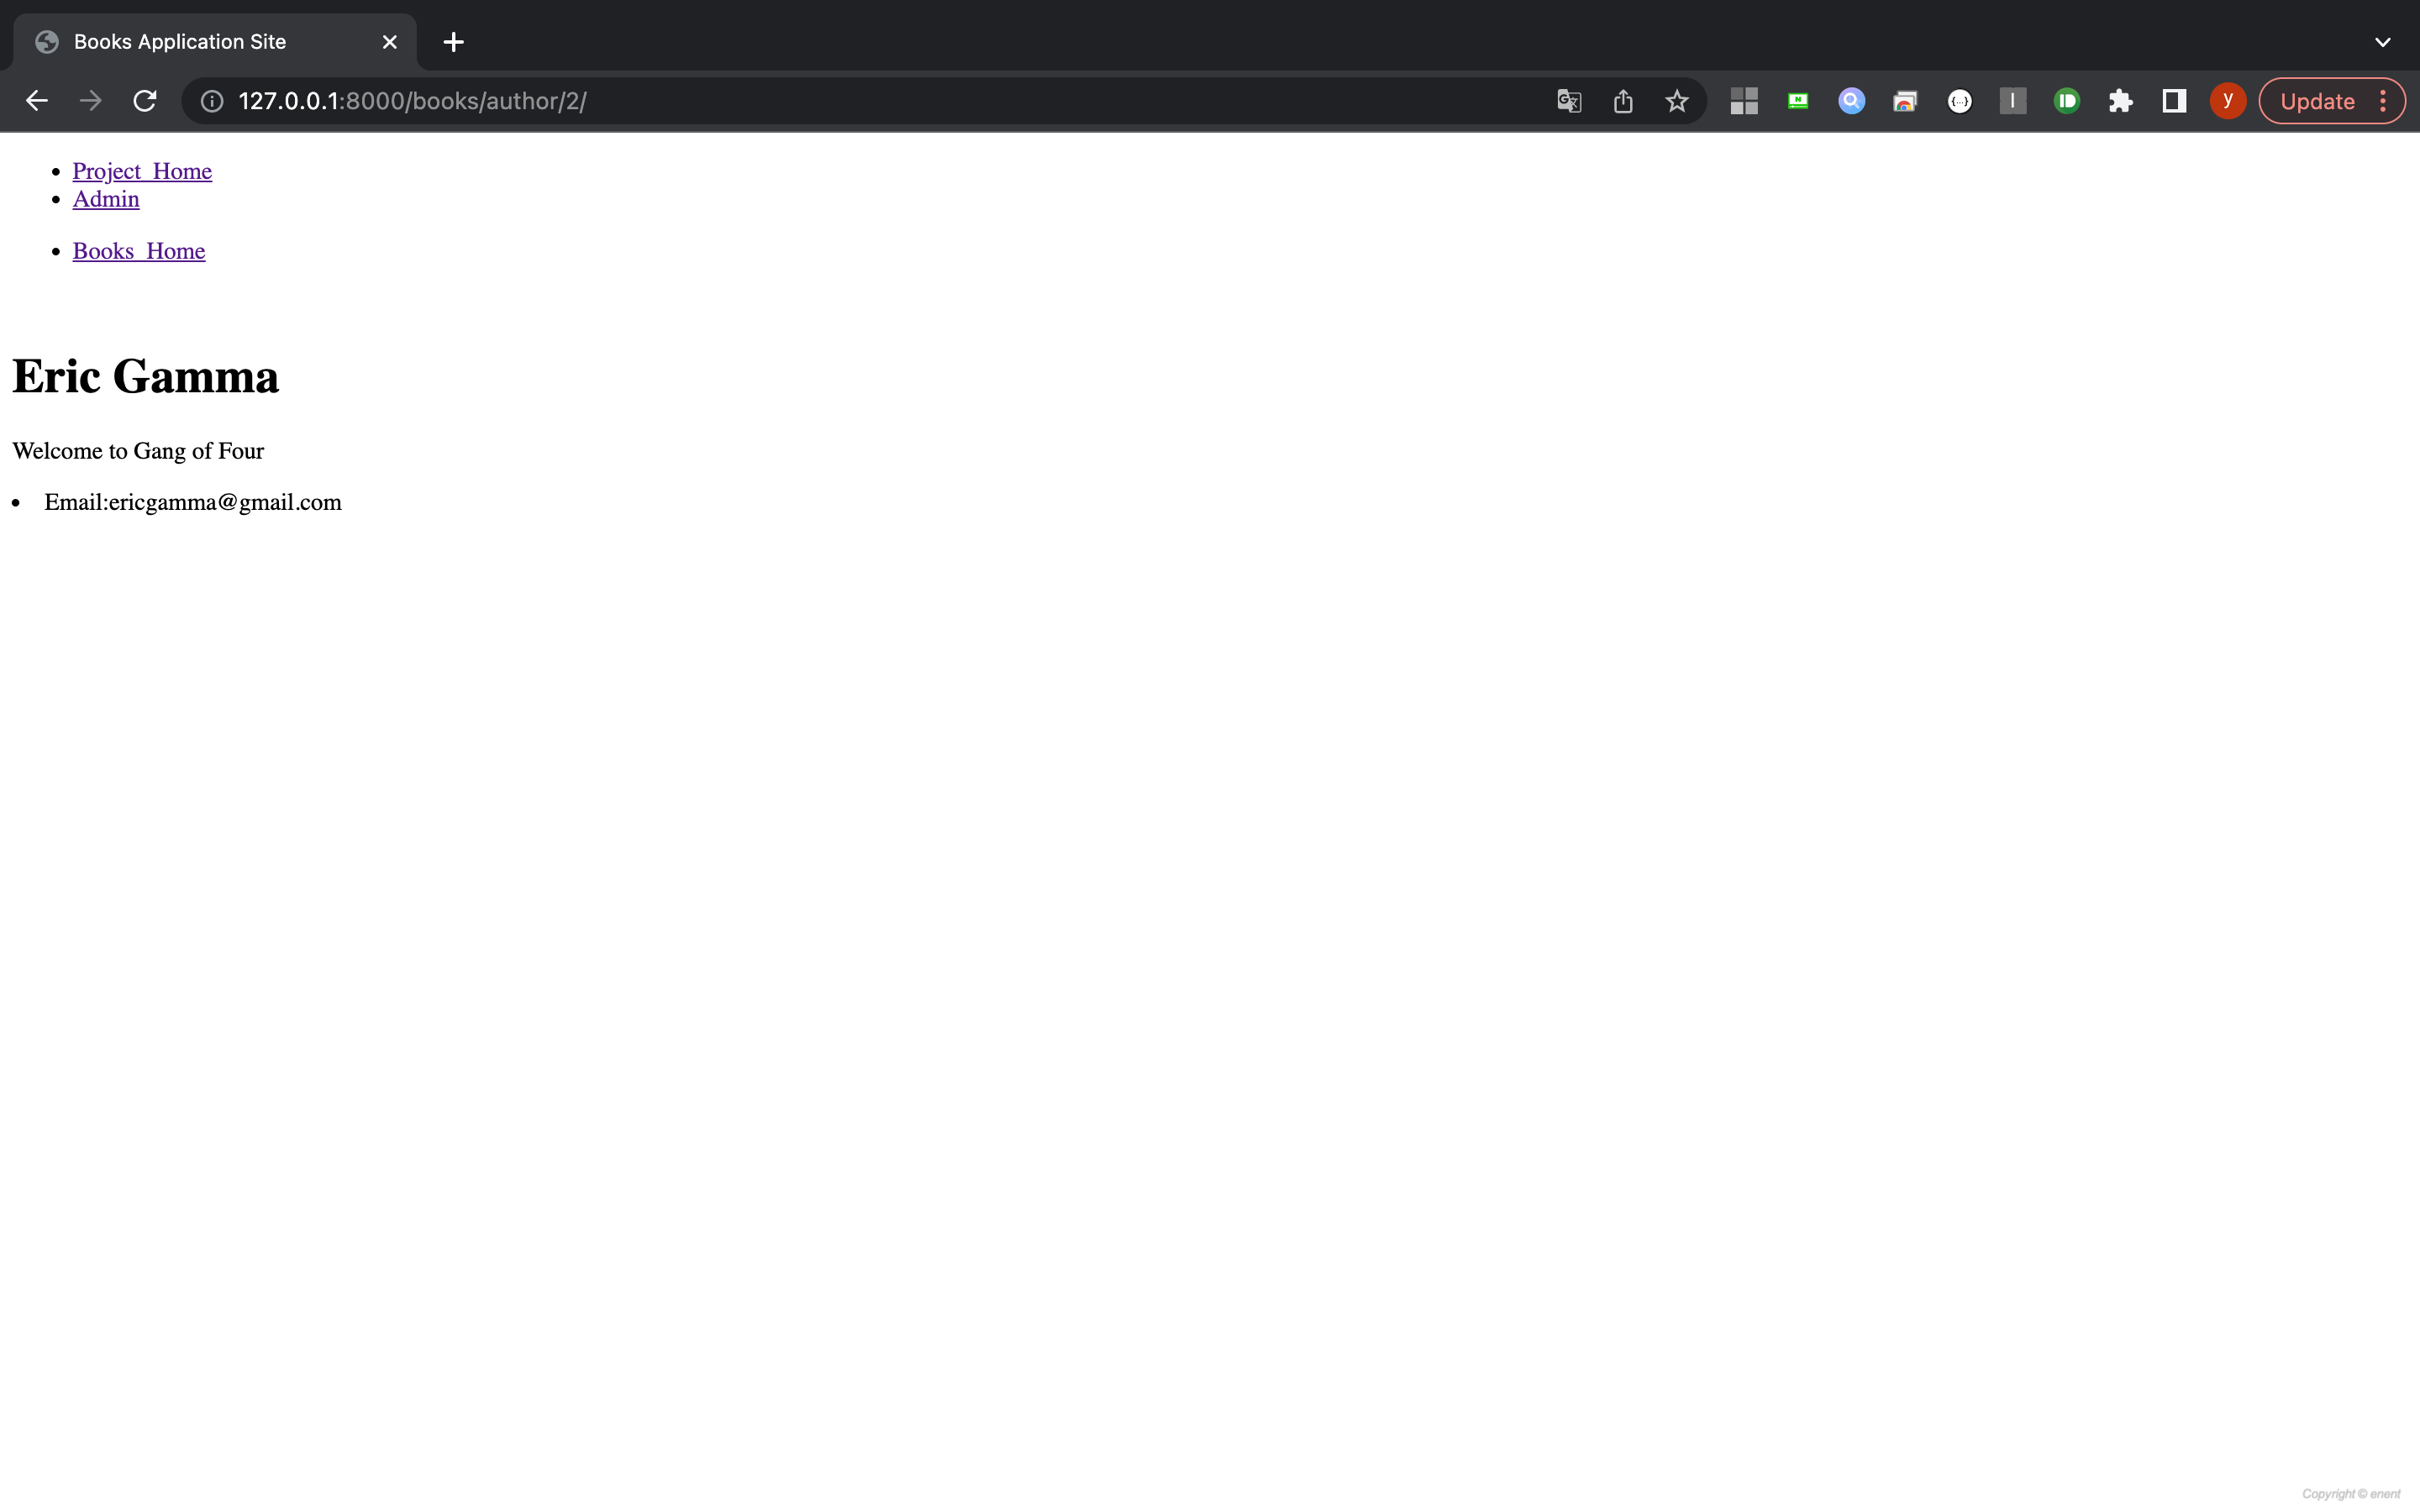
⑤ author_detail.html
{% extends "base_books.html" %}

{% block content %}
<h1>{{ object.name }}</h1>
<p>{{ object.salutation }}</p>
<li>Email:{{ object.email }}</li>
{% endblock content %}
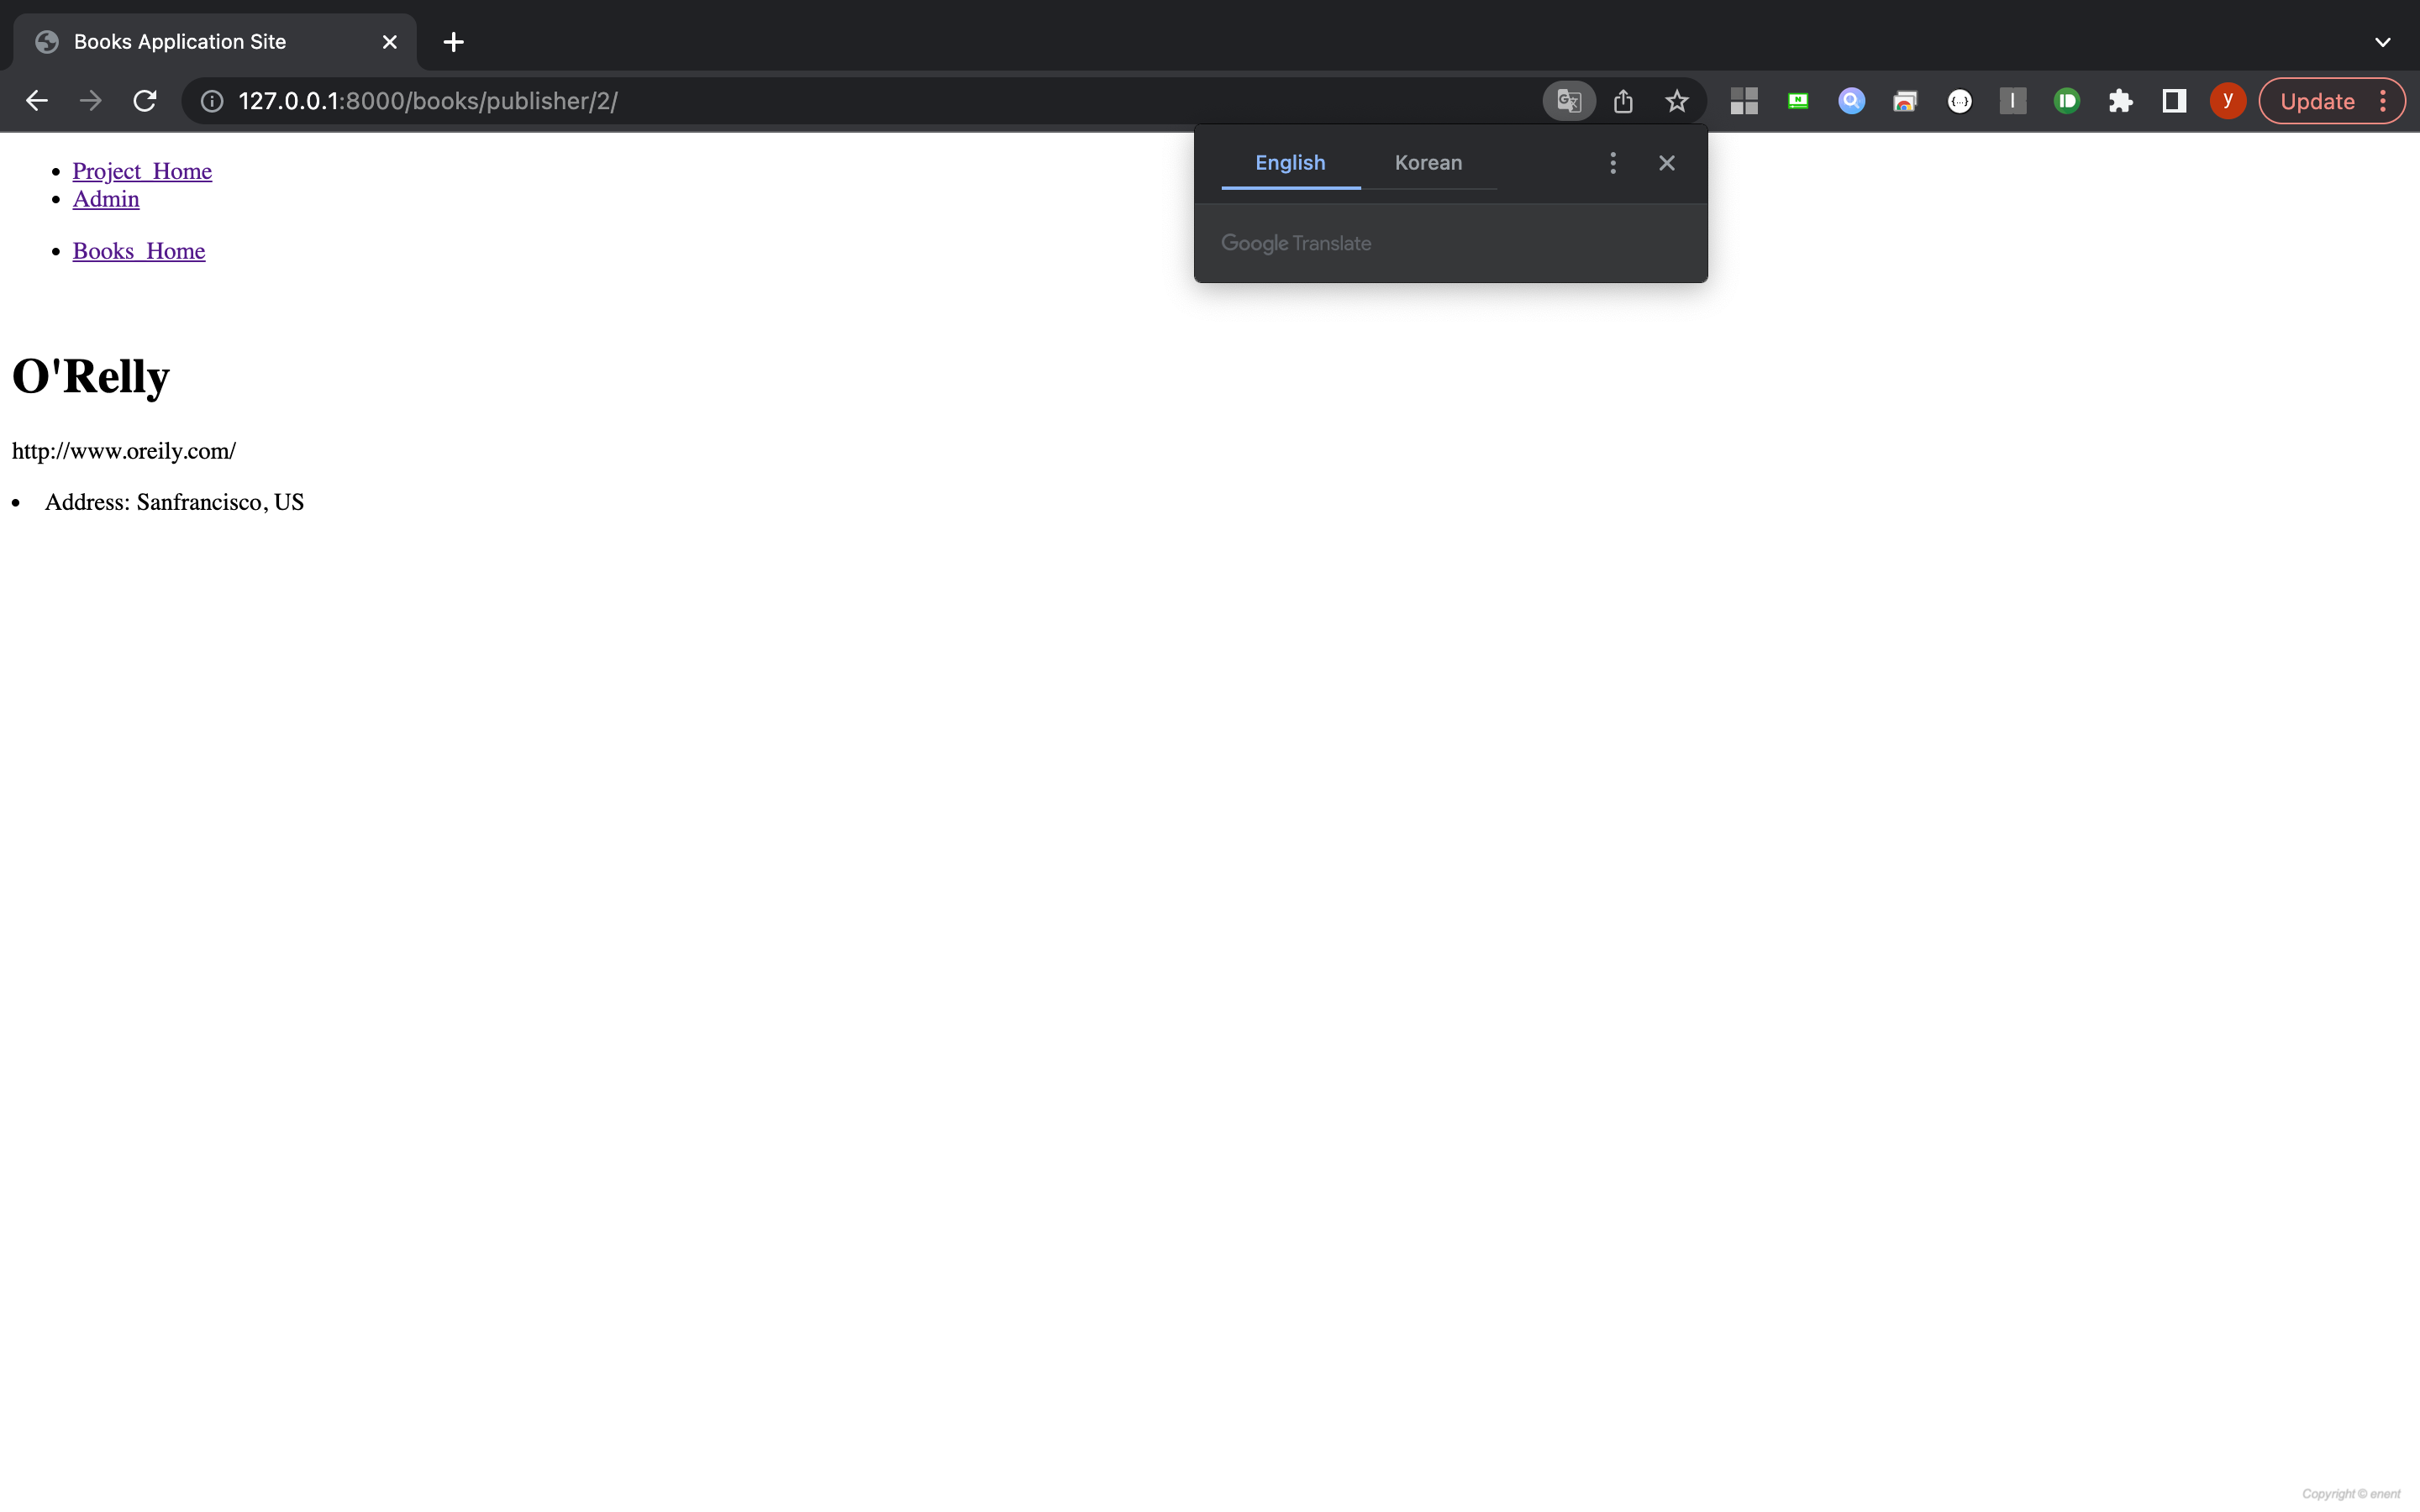
⑥ publisher_detail.html
{% extends "base_books.html" %}

{% block content %}
<h1>{{ object.name }}</h1>
<p>{{ object.website }}</p>
<li>Address: {{ object.address }}</li>
{% endblock content %}
3) Parent template
Django에서 일반적으로 권고하는 3단계의 구조로 작성하기 위해 base.html / base_books.html으로 나누어 개발한다.
(base.html <- base_books.html <- _detail/list.html 등
이 때 이 디렉토리들은, 제일 하위 디렉토리보다 상위 디렉토리 (~~/template)에 위치해야 한다.
① base.html
- 최상위 Template
- {% load statis %} : static 사용자 정의 태그 로딩. 사용자 정의 태그를 통해, admin/css/base.css를 찾는다
<!DOCTYPE html>
<html lang="en">
<head>
    <meta charset="UTF-8">
    {% load static %}
    <link rel=stylesheet" href="{% static "admin/css/base.css" %}"/>
    <title>{% block title %}My Site{% endblock %}</title>
</head>
<body>
    <div id="sidebar">
        {% block sidebar %}
        <ul>
            <li><a href="/">Project_Home</a></li>
            <li><a href="/admin/">Admin</a></li>
        </ul>
        {% endblock %}
        <br>
    </div>

    <div id="content">
        {% block content %}{% endblock %}
    </div>
</body>
</html>
② base_books.html
- base.html을 상속받아 title, sidebar 블록 재정의
- {{ block.super }} : base.html Template에서 정의한 내용을 하위인 현재 Template에서 재사용할 때 사용
{% extends "base.html" %}

<title>{% block title %}Books Application Site{% endblock %}</title>

{% block sidebar %}
{{ block.super }}
<ul>
    <li><a href="/books/">Books_Home</a></li>
</ul>
{% endblock %}
7. Run Server
$ python manage.py runserver
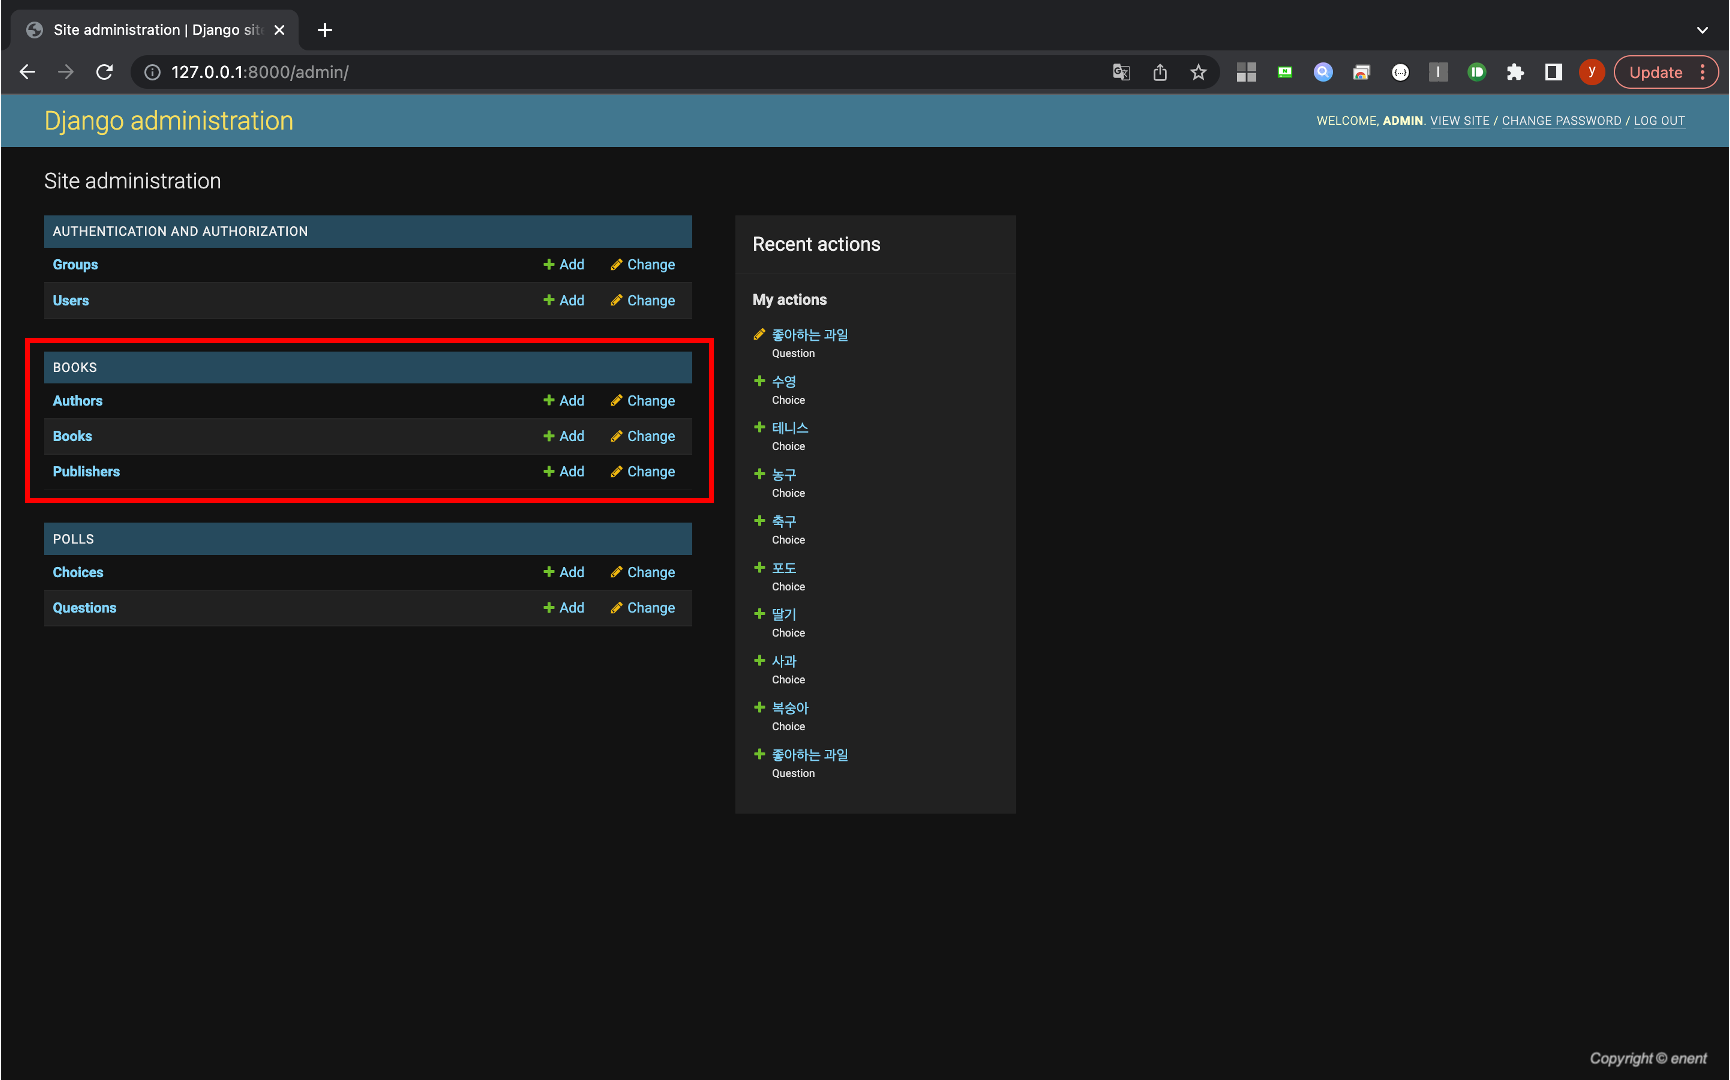
① Admin 접속 후 Sample Data 입력


'------ Web ------ > Backend' 카테고리의 다른 글
| [Django] Project Home Page (실습4) (0) | 2022.07.20 |
|---|---|
| [Django] Class-based View (0) | 2022.07.04 |
| [Django] Form (0) | 2022.07.03 |
| [Django] Template System (0) | 2022.06.28 |
| [Django] Admin (0) | 2022.06.26 |
